Disney’s Lightning Lane Multi Pass / Lightning Lane Single Pass allows guests to pay to skip the standby lines at some of Disney’s most popular attractions. If you want to make the most of your park days and accomplish many attractions with minimal wait time, this service is a worthwhile purchase for your family. To make the most of your investment, you’ll want to be strategic about making your ride selections.
Lightning Lane Single Pass is an a la carte purchase for select top-tier attractions. These are not included with Lightning Lane Multi-Pass, so you’ll want to determine if these rides are important enough for you to pay additionally to ride. These rides are Flight of Passage, TRON Lightcycle Run, Seven Dwarfs Mine Train, Rise of the Resistance, and Guardians of the Galaxy: Cosmic Rewind.
Read on for 5 strategies to help you maximize your use of Lightning Lane Multi-Pass.
1. Take advantage of staying onsite – Guests who stay at Disney World Resorts are eligible to book their Lightning Lane selections beginning 7 days before their trip, whereas guests staying offsite are eligible to book beginning 3 days prior. This may not seem like a lot, but it’s quite a big advantage. You will have the most availability of attractions and the best selection of return times to choose from, which means you’ll have a great jump start on getting the most done each day. Staying on-site has many perks, but this one might be one of the most beneficial if maximizing your park days is a priority for you.
2. Ensure your app is ready – Lightning Lanes must be purchased and managed from your My Disney Experience app on your phone (not the web). It’s a good idea to log in a day or two before your booking window begins and ensure everything is ready to go so you don’t run into any issues. Ensure that your resort or park ticket reservation is properly linked and all members of your party show up in your Friends and Family list. Make sure you have a credit card saved on file. You can also preview the Lightning Lane prices for each park up to 2 weeks in advance so you can even take a peek at what the investment will look like on your booking day.
3. Don’t book in chronological order – When it’s your time to book your Lightning Lane selections, you do not have to book in the order in which you’re visiting the parks. Instead, you’ll want to begin by booking the parks with the most popular attractions first. I suggest the order of Hollywood Studios, Magic Kingdom, Epcot, and then Animal Kingdom regardless of where these parks fall in your overall Disney schedule. This gives you the best chance at securing those top-notch attractions with return times earlier in the day.
4. Book a “burner ride” – If you’re taking notes, you will want to write this one down because this is a very strategic move that helps you open up your ability to book popular Lightning Lanes as soon as possible. During the pre-selection booking, you are allowed to book 1 attraction from the list of Tier 1 rides in each park and 2 attractions from the list of Tier 2 rides in each park (with the exception of Animal Kingdom since it doesn’t have tiered attractions). This rule is in place to keep things fair so everyone can book those most popular rides.
However, once you are in the park and begin redeeming your Lightning Lanes, that rule no longer applies – you are free to book any ride in any tier from then on. So, the idea here is that you want to open up the opportunity to begin your subsequent booking early in the day.
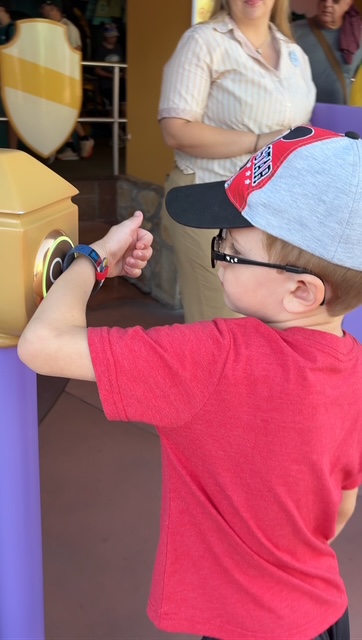
Sometimes, with the popular attractions (ex: Slinky Dog Dash, Remy’s Ratatouille Adventure, Tiana’s Bayou Adventure, etc) you’ll be given an initial return time in the mid-morning or early afternoon. But many of the “less popular” attractions in Tier 2 will have return times available for as soon as the park opens. What you’ll do is book one of these easy rides (ex: Alien Swirling Saucers, Spaceship Earth, Dumbo, etc) even though you don’t usually need a Lightning Lane for it so early in the day. But as soon as you tap into this ride, you open the opportunity to book more of those really popular rides. And the sooner you can get to booking those, the better your chances of hitting the greatest amount of Lightning Lanes in your day.
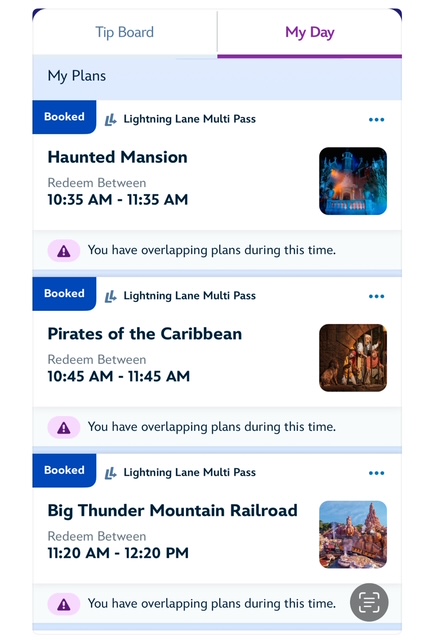
5. Modify your return times – Return times for attractions are more flexible than you might think. First of all, you have a window of 5 minutes before your return time and 15 minutes after your return time to tap into your ride. So a 1-hour return window is a 1-hour and 20-minute return window.
Additionally, you can modify your return times (based on availability) if something comes up in your day. So, if you are enjoying a certain area in the park and your next Lightning Lane attraction is on the other side, see if you can modify the time back a little bit before rushing your family across the entire park. Even bumping things back by 15-20 minutes can give you more time to enjoy where you’re at before moving on to the next thing.
Overall, purchasing this service is a great way to maximize your park days. If you have kids who don’t enjoy waiting in long lines or you’re looking to get a lot accomplished each day, this is a worthwhile add-on to your Disney vacation.
As a Smart Moms Travel Agent, a big part of my job is to help you feel prepared for your park days, including everything from determining your priority attractions to creating successful park day itineraries. For more tips and tricks and all the latest news coming out of Disney, subscribe to the blog and follow me on Instagram @theorganizeddisneymom.
Not working with a Smart Moms Travel agent yet, but looking for help to plan your family’s upcoming Disney trip? I would be happy to work with you to develop a personalized Disney strategy that meets your family’s needs. You can click here to enlist my help for free!